Posted on June 10 2019
 You know your feet have a vital function—you stand on them, you walk on them, you balance on them. You also probably treat your feet with respect, from pedicures to perfectly cushioned running shoes. You also have another pair of weight-bearing extremities—your wrists and hands.
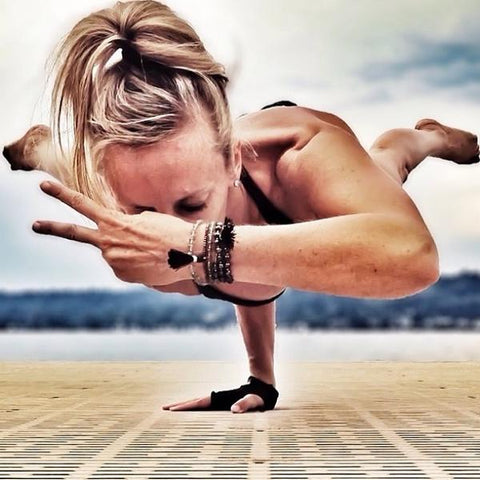
Now think about how you use them in your daily life. You type with them at work, cook with them and use them to hug your loved ones. In your yoga practice, you might be asked to stand on them--think inversions and arm balances like Adho Mukha Vrksasana (Handstand). You might end up sharing weight between your hands and your feet in poses like Plank Pose. But, do you take care of them? You might not think about the demands you place on hands until pain or injury reminds you. Despite its importance and delicacy, it’s often overlooked. You stretch your calves after a workout, but you might not stretch your wrists after a long day at the computer.
When it comes to your yoga practice, wrist pain can be discouraging and frustrating—not to mention a real limit to the poses you can attempt. Heading to your mat with that might leave you ready to say, “That’s enough” and walk away from your practice. But, if you learn to work with your body, your practice can a powerful healing tool. You may have to avoid putting your weight on your hands for a few days or weeks, but you can use that time to strengthen and stretch your wrists so that when you do go for Tittibhasana (Firefly Pose), you can fly away.
As in all of yoga, one key to eliminating pain is treating your body as a whole. A weak core, tight shoulders or a too-flexible lower back can all throw more pressure on your hands. When you practice, visualize each movement beginning from the middle of your body and stretching outward in all directions. Feel the strength in your arms, even if they aren’t on the floor. If you are doing an arm balance, firm your shoulder blades so that your weight doesn’t collapse into your hands.
Here are a few ways to make your practice wrist-friendly:
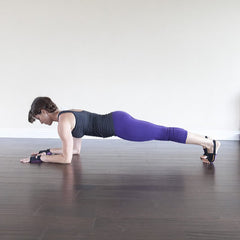 |
Makara Dandasana (Dolphin Plank Pose)Benefits: This poses helps strengthen your core, allowing you to rest your wrists while stabilizing your body. How to do it: Begin in Dolphin Pose with your palms pressed together and walk your feet back until your shoulders align with your elbows. Focus on lifting your front body into your spine. Hold for 30 seconds to one minute. Then slowly raise hips and walk feet up to a comfortable position. Stretch back for a relaxing Downward Dog. Spread your shoulders and push your hips up and back until a nice stretch is felt in the hamstrings.
|
|
|
Uttana Manibandha Bitilasana (Modified Tabletop Pose, or Wrist Stretch Cow Pose)Benefits: NYC yoga teacher Tara Stiles uses this stretch to loosen wrists cramped from typing, sewing or daily life. How to do it: Begin on your hands and knees, with your knees under your hips and your wrists under your shoulders. Turn your right wrist so that your fingers point toward your legs and gently push your hips back until you feel a stretch across the wrist. Hold for three breaths, then return to tabletop and repeat on the other side, for a total of two or three stretches on each side. |
|
|
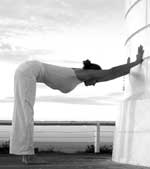
Ardha Adho Mukha Svanasana (Half Downward-Facing Dog Pose)Benefits: This variation of Adho Mukha Svanasana (Downward-Facing Dog Pose) gives you the length and extension of the full pose while loosening your shoulders and taking the weight out of your wrists. How to do it: Stand facing a wall. Place your hands against the wall at hipbone height, making sure your palms are as close to fully connected to the wall as possible. Step back until your body forms an L shape. Focus on creating length along your spine and keeping your head between your forearms and not letting it sag. Remain in the pose for 30 seconds to one minute. |
|
|
|
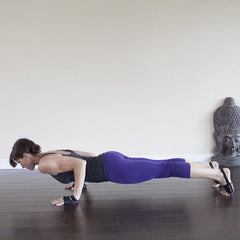
Line it Up. Incorrect alignment is a major cause of pain. Make sure that your hands stay under or even slightly ahead of your shoulders in poses like Adho Mukha Svanasana (Downward-Facing Dog Pose) or Chaturanga Dandasana (Four-Limbed Staff Pose). You can also alleviate some pressure by gripping dumbbells, balancing on your fists instead of your palm, or folding a sticky mat or blanket under your hands. |

Make sure when you practice that you are listening to your body. Pushing through pain won’t get you to your dream arm balances any faster. Instead, use these tips to help alleviate the discomfort. When you do head into poses that put weight on your arms, keep your intentions calm. If you feel great, go for it! If not, back off the pose.
Thanks for reading! Feel free to take 10% off your next order with code: PAWBLOG